Testing voltage drops on Raspberry Pi 2
For smooth operation the voltage on Raspberry Pi 2 board should be in between 4.75 and 5.25 volts.
Test Case:
Voltage drops below 4.75V on Raspberry Pi 2 board
What you need:
- Arduino UNO board
- USB A-to-B cable
- Hookup wires
- Computer with Arduino IDE installed
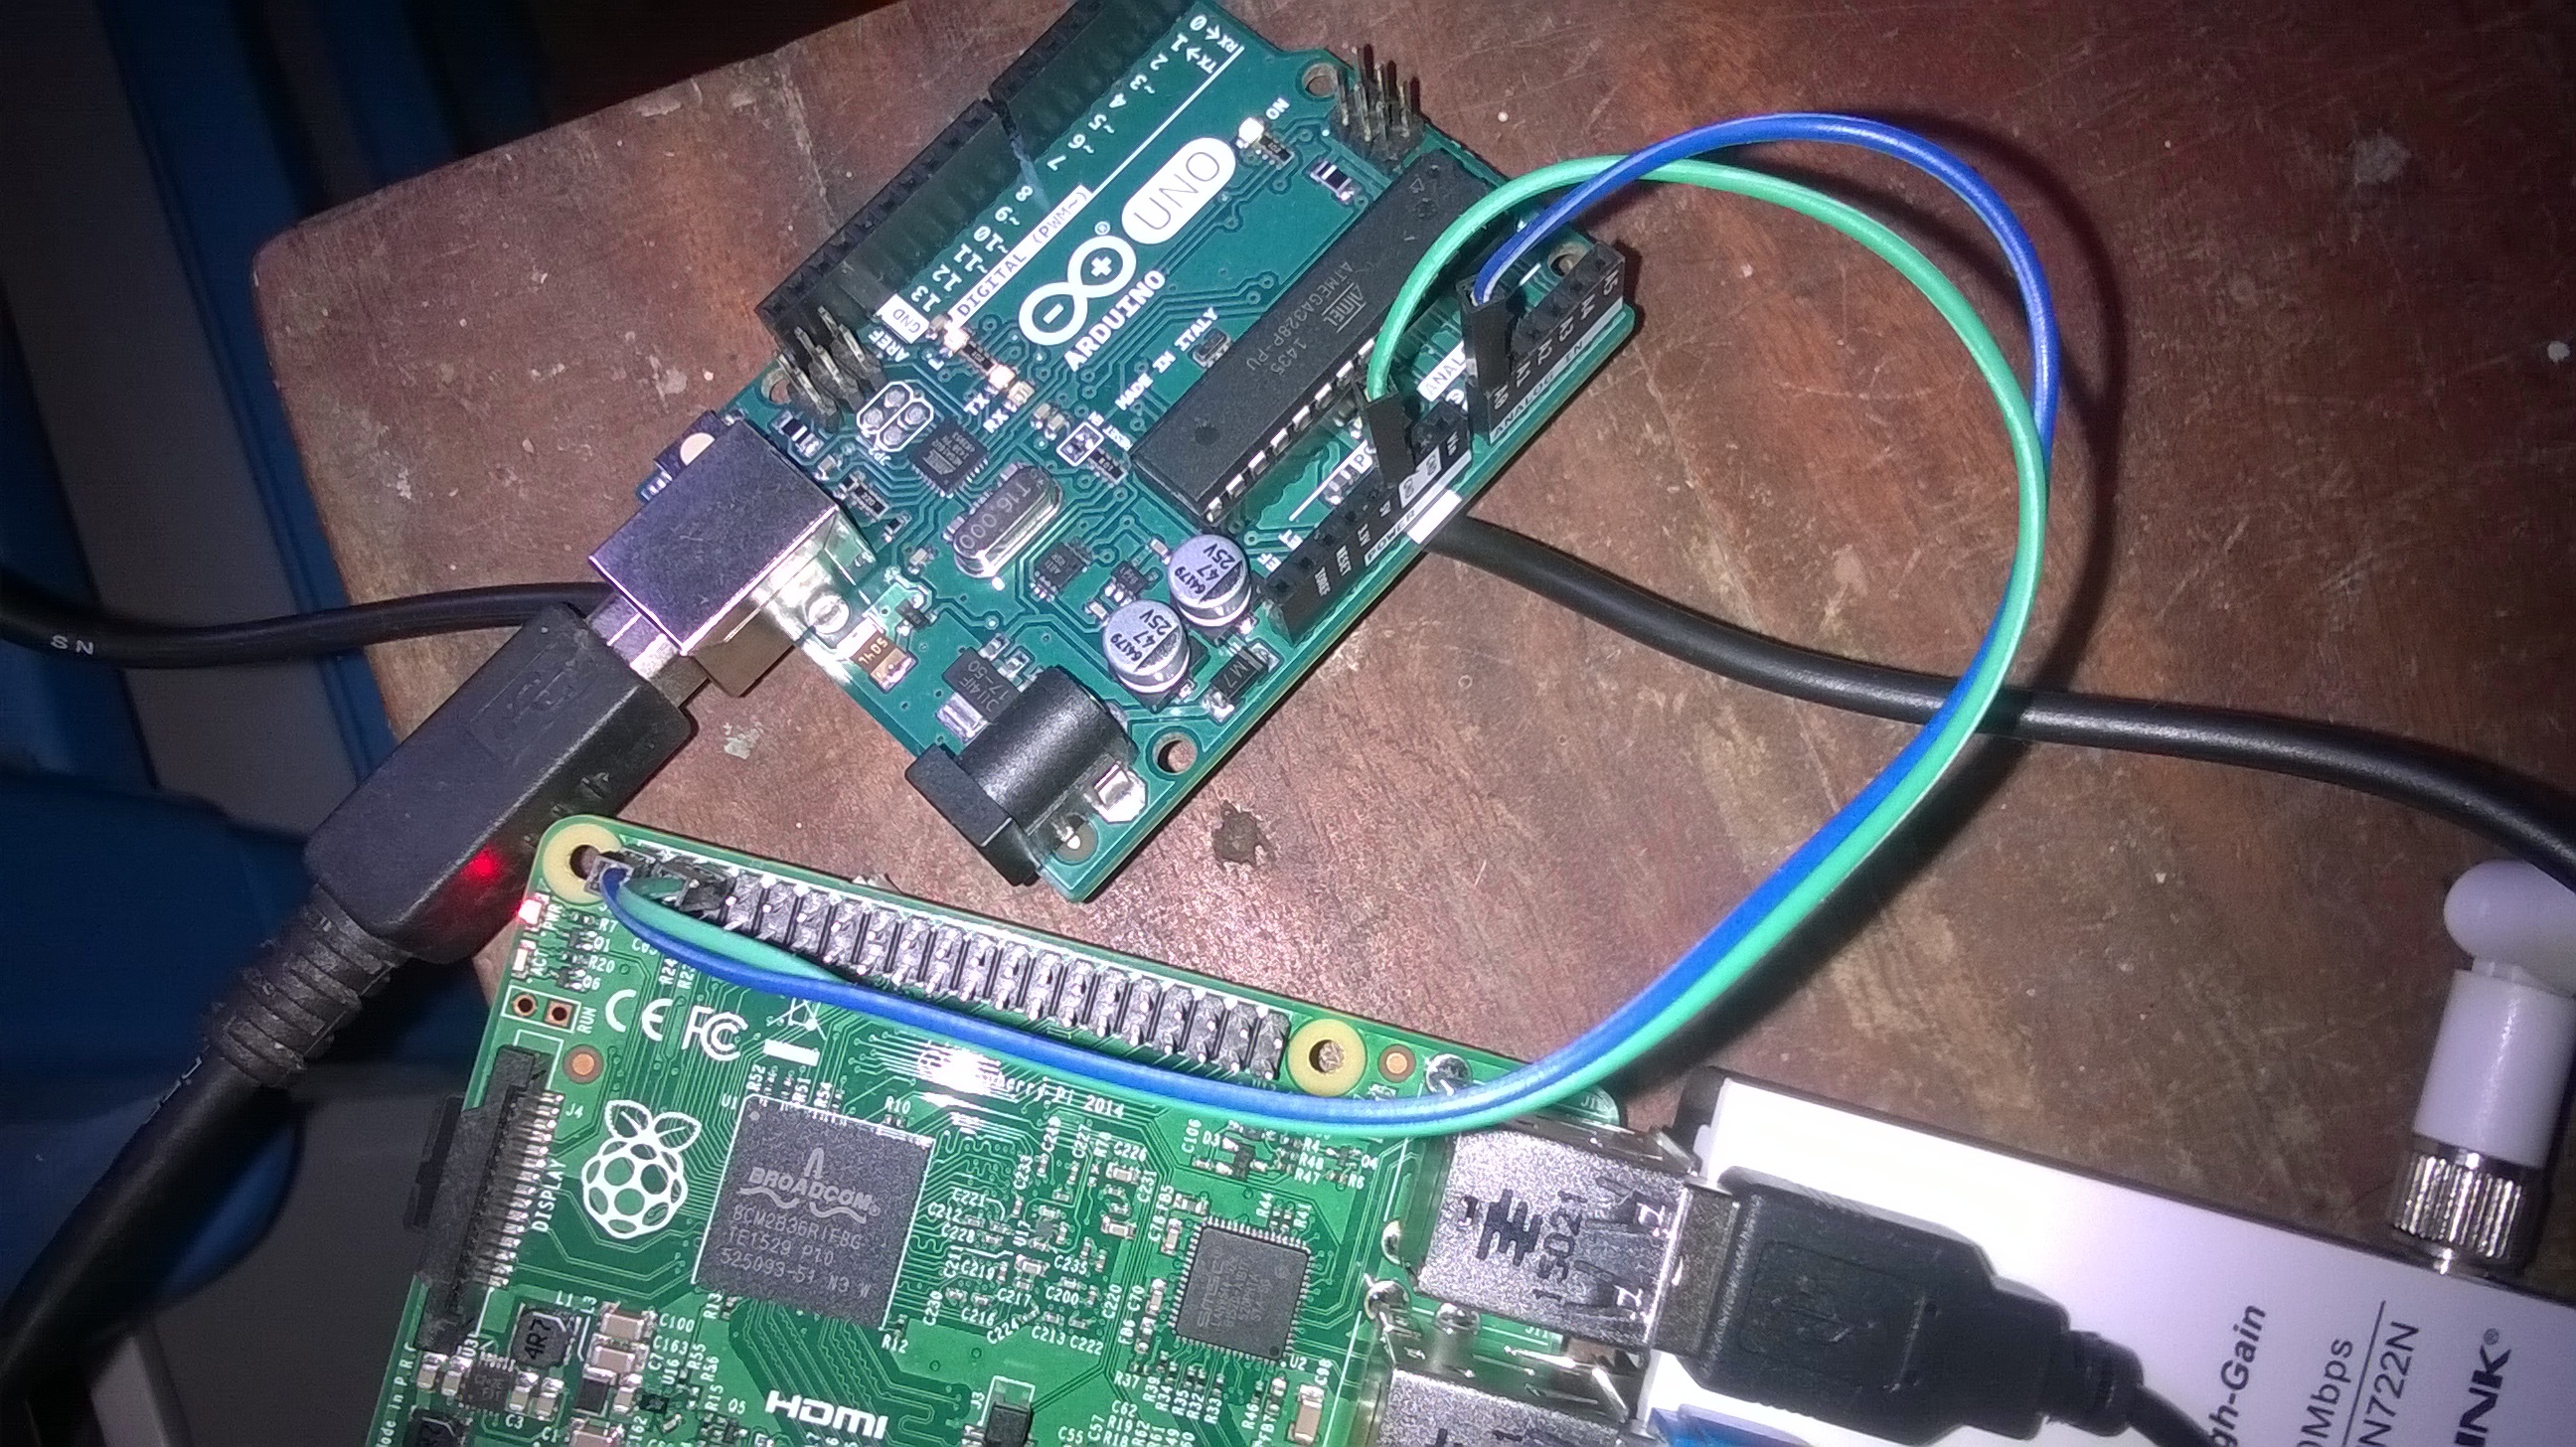
Wiring:
Using hookup wires,
- connect PRi2 GIPO pin 2 with Arduino analog pin A0.
- connect RPi2 GIPO pin 6 with Arduino GND


Uploading Sketch:
-
Connect your Arduino with PC using USB A-to-B cable.
-
Upload the following Arduino sketch in to your Arduino UNO board.
void setup()
{
Serial.begin(9600);
}void loop()
{
int gipoVoltage = analogRead(A0);float voltage = gipoVoltage * (5.0 / 1023.0);
Serial.println(voltage);
//delay(1000);
}
Executing:
- Open Arduino Serial Monitor from the Arduino IDE.
- Power up to start the ORxPi receiver.
- The Arduino Serial Monitor will continually display the voltage on Raspberry Pi 2 board.

Next: Automation this test
About automate this test [TODO] will update soon ![]()